According to the latest intelligence, the method in this article is outdated, as Comrade Da Vinci has developed a new launch method that works for all versions from Minecraft 1.7 to the present. This ultimate weapon is called: Hei Liao Ta-3000. Oops… my bad, wrong script, but the new launch method is real, M1-HMCL-Hack is now online!
# No Rosetta
At the end of the summer vacation, my friends said this was the last time we would all have so much free time to play Minecraft together. Hearing this, I couldn’t help but feel a bit sentimental.
But as soon as the winter vacation started, another friend in the group shouted to start the server. Oh well, since it’s the holidays, might as well indulge, right?
I ditched the mid-tower with a 2700X+GTX960 in my room because it took up too much space and tossed it in the scrap heap; my Windows laptop with an i7-7200U+940MX lags while playing Minecraft. So, I had no choice but to try running Minecraft on my M1 MacBook.
Since I was already tinkering, why not play the native ARM architecture’s Minecraft on the M1 MacBook—smooth and high-end (definitely not because I didn’t know how to use Rosetta, right?).
# Key to Running: LWJGL
According to Tanmay Bakshi’s tutorial video and his tutorial Gist, the biggest issue preventing Minecraft from running directly on the M1 Macbook is that Minecraft’s built-in LWJGL library doesn’t work well with macOS-ARM64 architecture, thus requiring the compilation of the latest LWJGL library from source code. Tanmay has compiled the necessary library for running the native MC, but the command-line launcher he used hardcoded the Minecraft version. yusefnapora created a Python script based on Tanmay’s library files.
However, since I was already diving deep, I wanted to use my frequently used Hello Minecraft Launcher (HMCL) launcher. Unfortunately, yusefnapora’s script only supports the MultiMC launcher because of MultiMC’s unique way of managing library files compared to other Minecraft launchers. After spending some time researching, I found a way to download and launch the Minecraft Forge client using the HMCL launcher on the M1 MacBook.
The installation and running method are outlined below.
# 1. Install Java
First, install Java. If you want to play Minecraft without Rosetta, you must use ARM native JavaSE.
Minecraft uses Zulu Java 11 JDK for macOS ARM64, which is more efficient on macOS than Oracle Java; as HMCL requires JavaFX for rendering the interface, use the JDK FX version. Open the download page, select the version as shown below, download the DMG, and install.
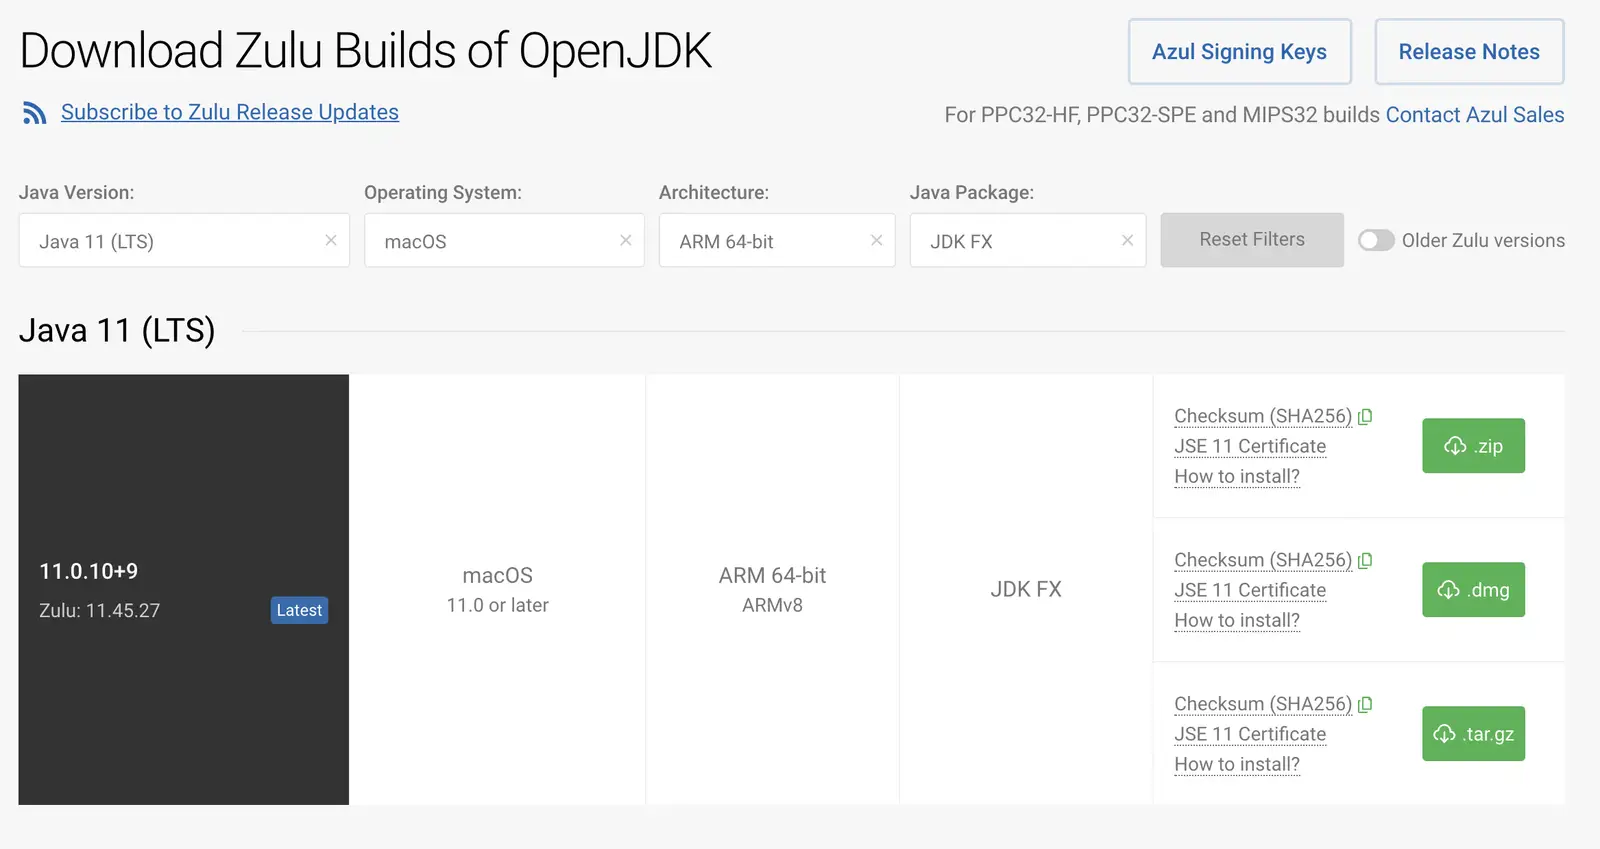
After installation, you can run /usr/libexec/java_home -V to view all Java versions on the system.
$ /usr/libexec/java_home -V
Matching Java Virtual Machines (3):
    11.0.10 (arm64) "Azul Systems, Inc." - "Zulu 11.45.27" /Library/Java/JavaVirtualMachines/zulu-11.jdk/Contents/Home
The line containing Zulu 11.xx.xx is the installation directory of Zulu JDK 11 that we need. I set the JAVA_HOME environment variable by modifying ~/.zshrc to tell the terminal which Java version the java command should use.
Add the following content to the end of ~/.zshrc.
# ~/.zshrc
export JAVA_HOME=/Library/Java/JavaVirtualMachines/zulu-11.jdk/Contents/Home
Use source ~/.zshrc or restart the terminal to apply the settings.
# 2. Download HMCL
Download the launcher from the HMCL official website, then run the following commands to create a game directory (e.g., ~/Games/Minecraft) and place the launcher in it.
mkdir -p ~/Games/Minecraft/ # create the game directory
mv ~/Downloads/HMCL-3.3.181.jar ~/Games/Minecraft # move HMCL to the game directory
java -jar HMCL-3.3.181.jar # open HMCL
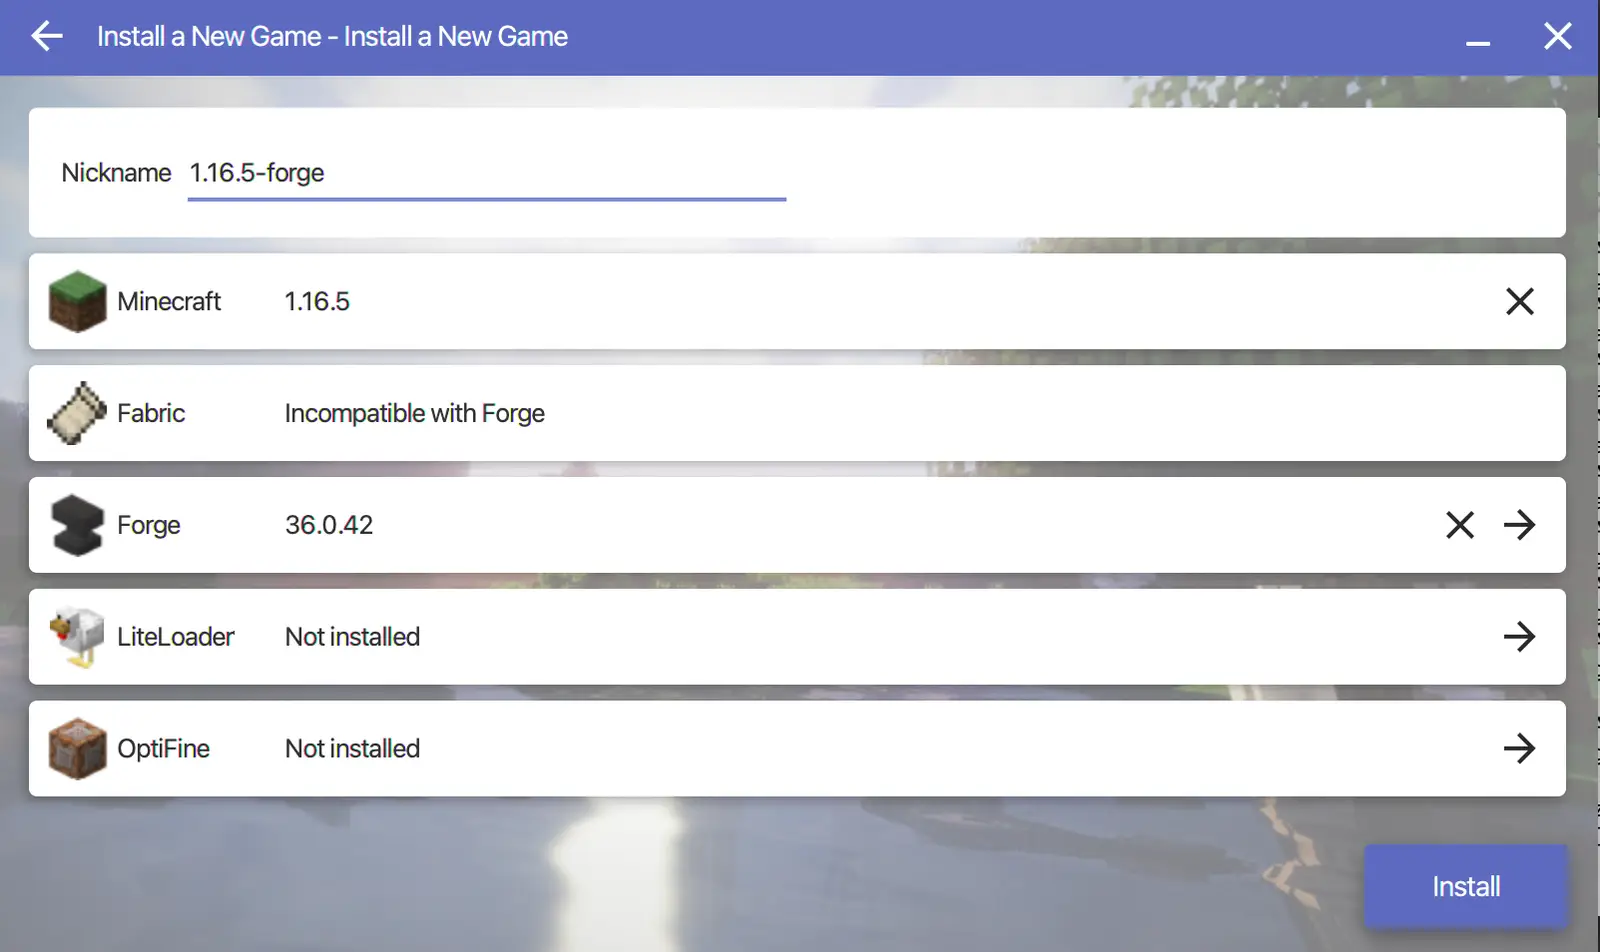
Now that HMCL can open normally, proceed as usual by going to Version List -> Install New Game Version to install Minecraft 1.16.5 version and Forge simultaneously.
# 3. Download Pre-compiled Library Files
As mentioned earlier, to run the Forge version of Minecraft, you need the latest LWJGL and the corrected GLFW library. Two crucial library files have been modified and compiled by Tanmay and 0xQSL.
Run the following commands to download the library files and move them to the appropriate locations.
cd ~/Games/Minecraft # navigate to the game directory
git clone https://github.com/DotIN13/m1-multimc-hack.git # clone the required library files locally
mv m1-multimc-hack/lwjglfat.jar .minecraft/libraries/org/lwjgl/lwjgl/3.2.1/lwjgl-3.2.1.jar # place the downloaded LWJGL library in the Minecraft runtime directory
# 4. Export Launch Script Using HMCL
Since we cannot specify the library file directory directly in the HMCL launch, we need to export the launch script and use the script to start the game.
Click on the game version we just installed in the sidebar, such as 1.16.5-forge, click the spanner🔧 icon in the toolbar above, ensure the Java version below is set to the Zulu JDK 11 installed earlier, and set the appropriate memory size. Then click on Generate Launch Script to save the script to ~/Games/Minecraft/start.sh.
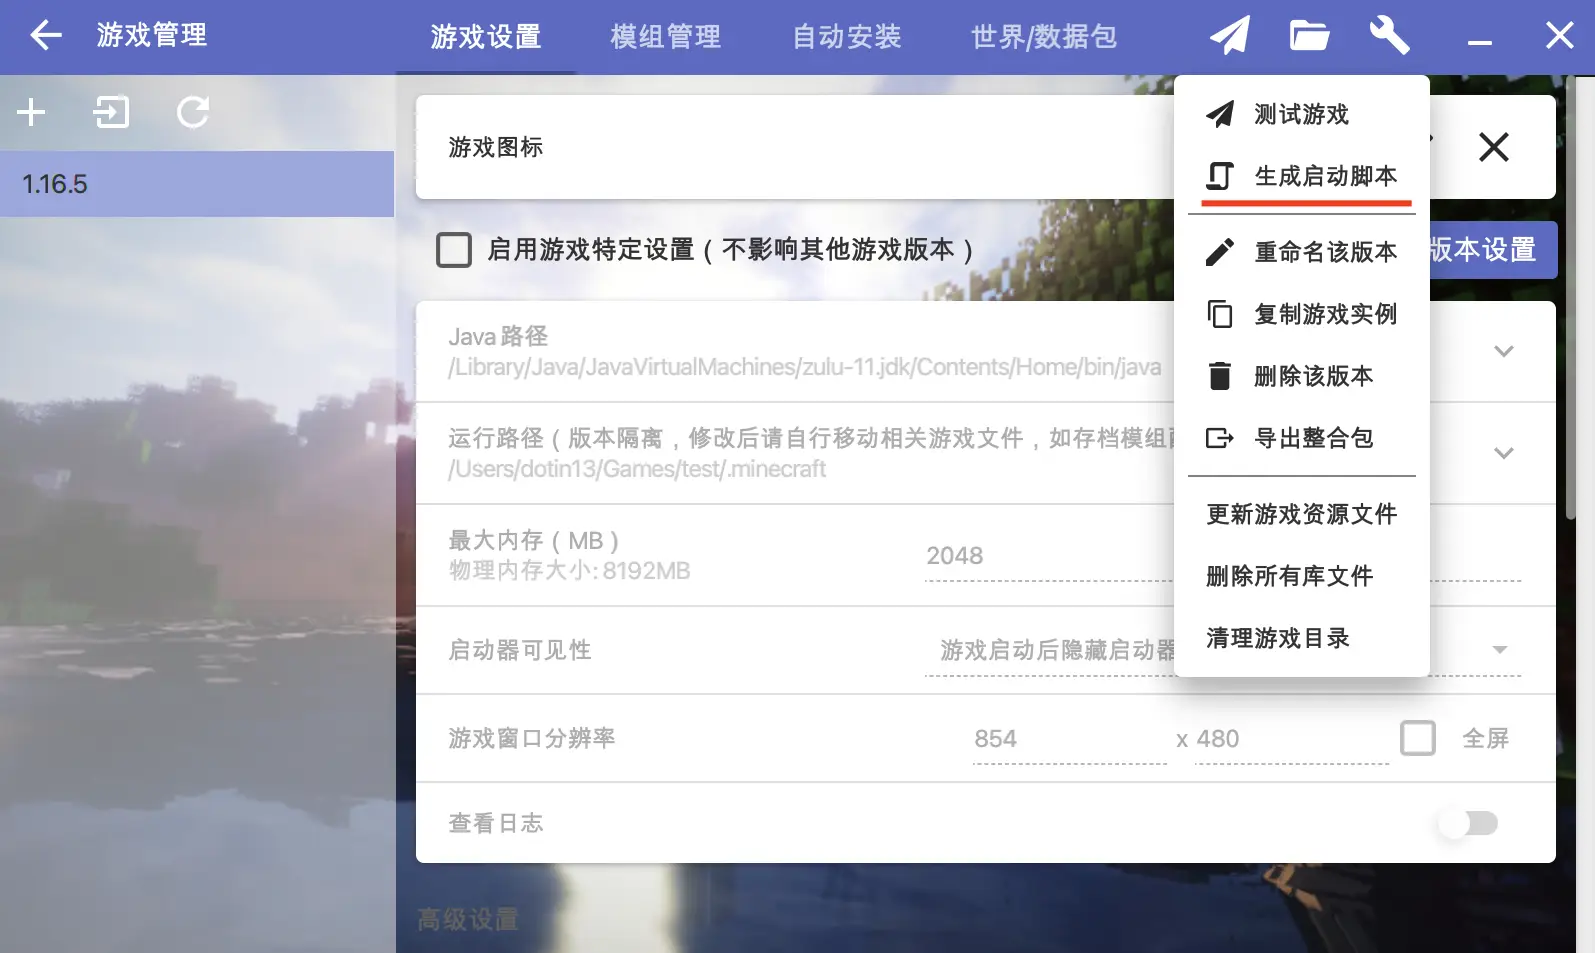
Edit start.sh as shown below and save.
# Locate the section with -Djava.library.path
# Modify it to "-Djava.library.path=/Users/Your_Username/Games/Minecraft/m1-multimc-hack/lwjglnatives/"
# Enable Java to call the native library files we downloaded earlier
# 5. Start Minecraft Using the Script!
Go to the terminal and run the following command to start Minecraft.
cd ~/Games/Minecraft # navigate to the game directory
./start.sh # the enchanting Minecraft launch interface appears
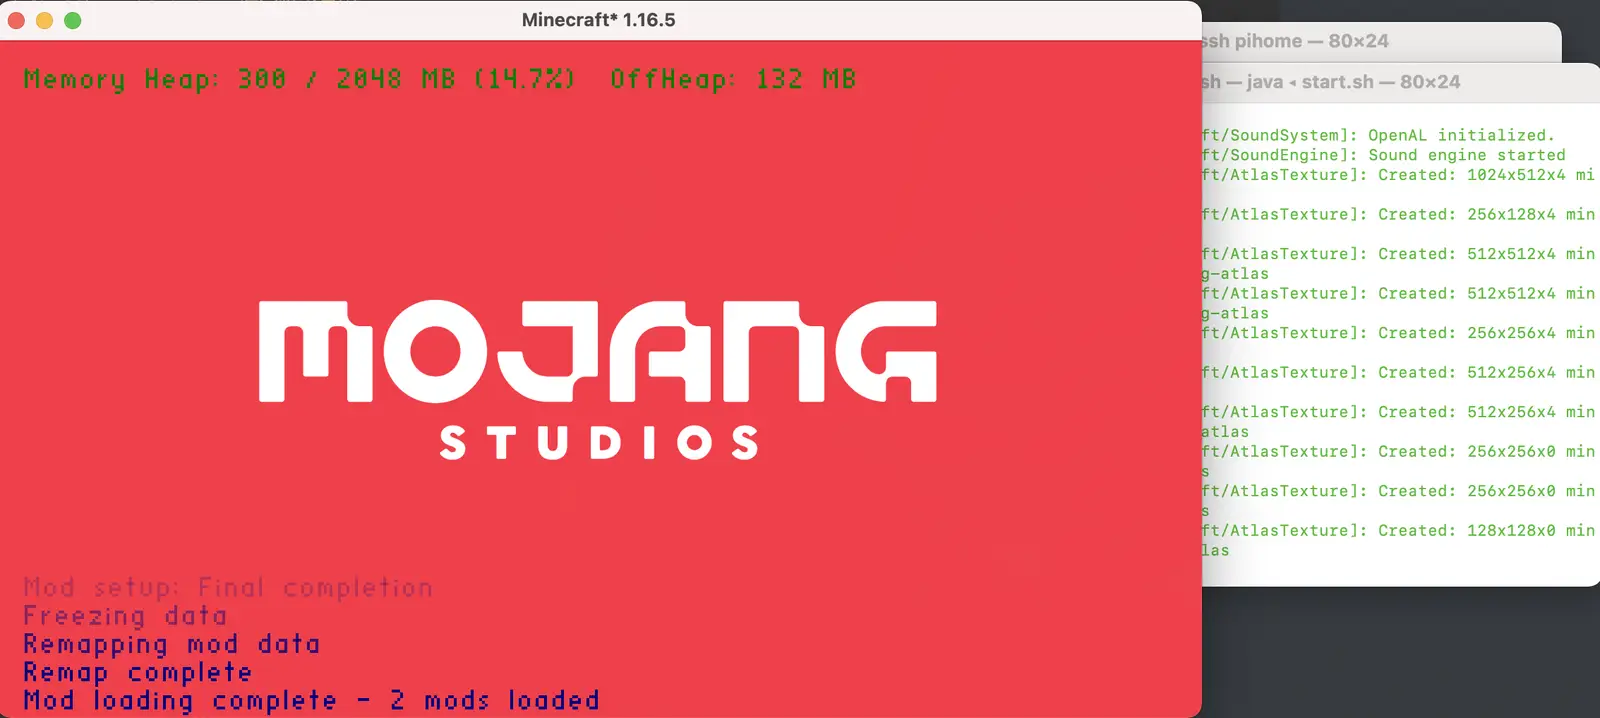
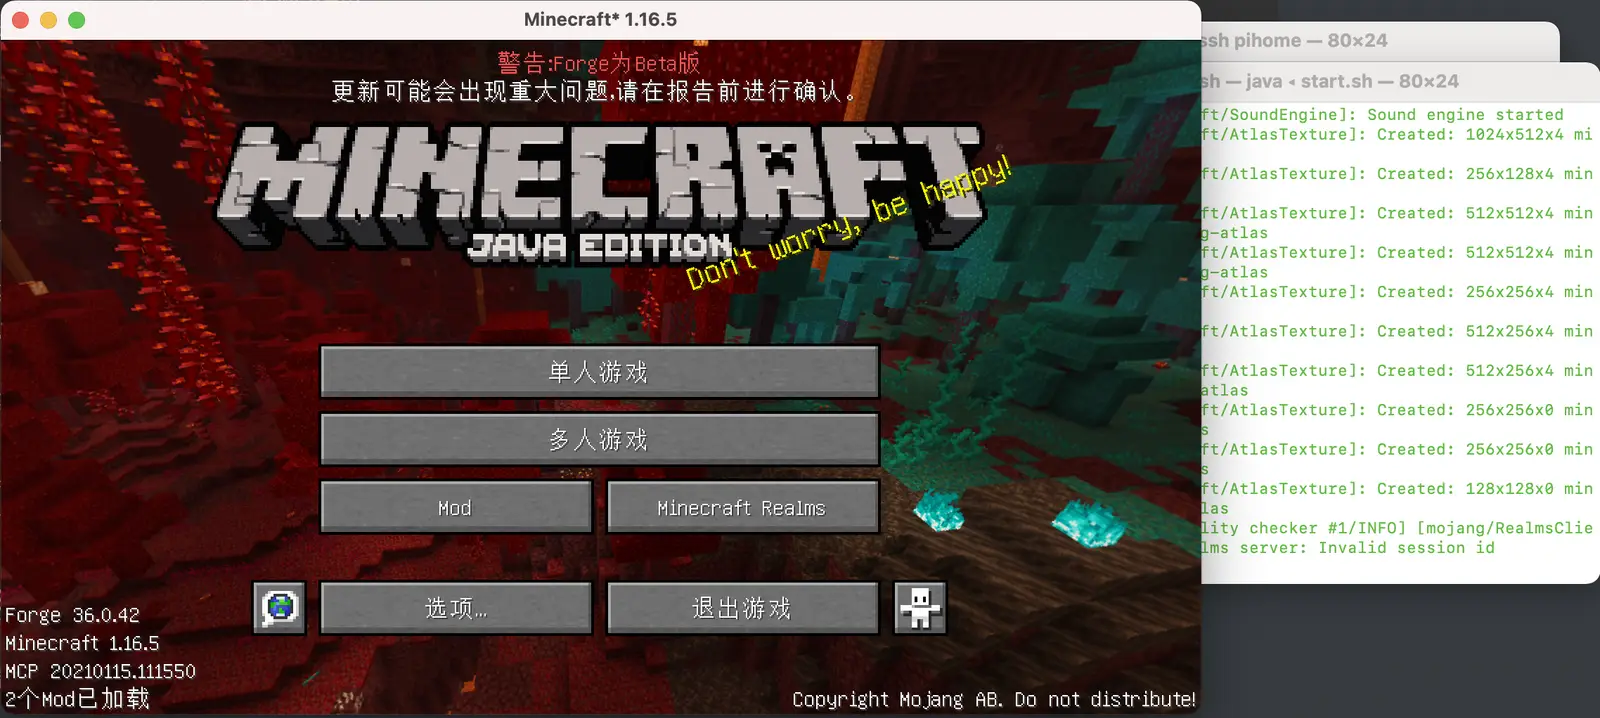
The Minecraft opening process is quick; after my tests, starting with 30 mods took around a minute or less. Changing the language took about 20 seconds. The gameplay was stable without any crashes.
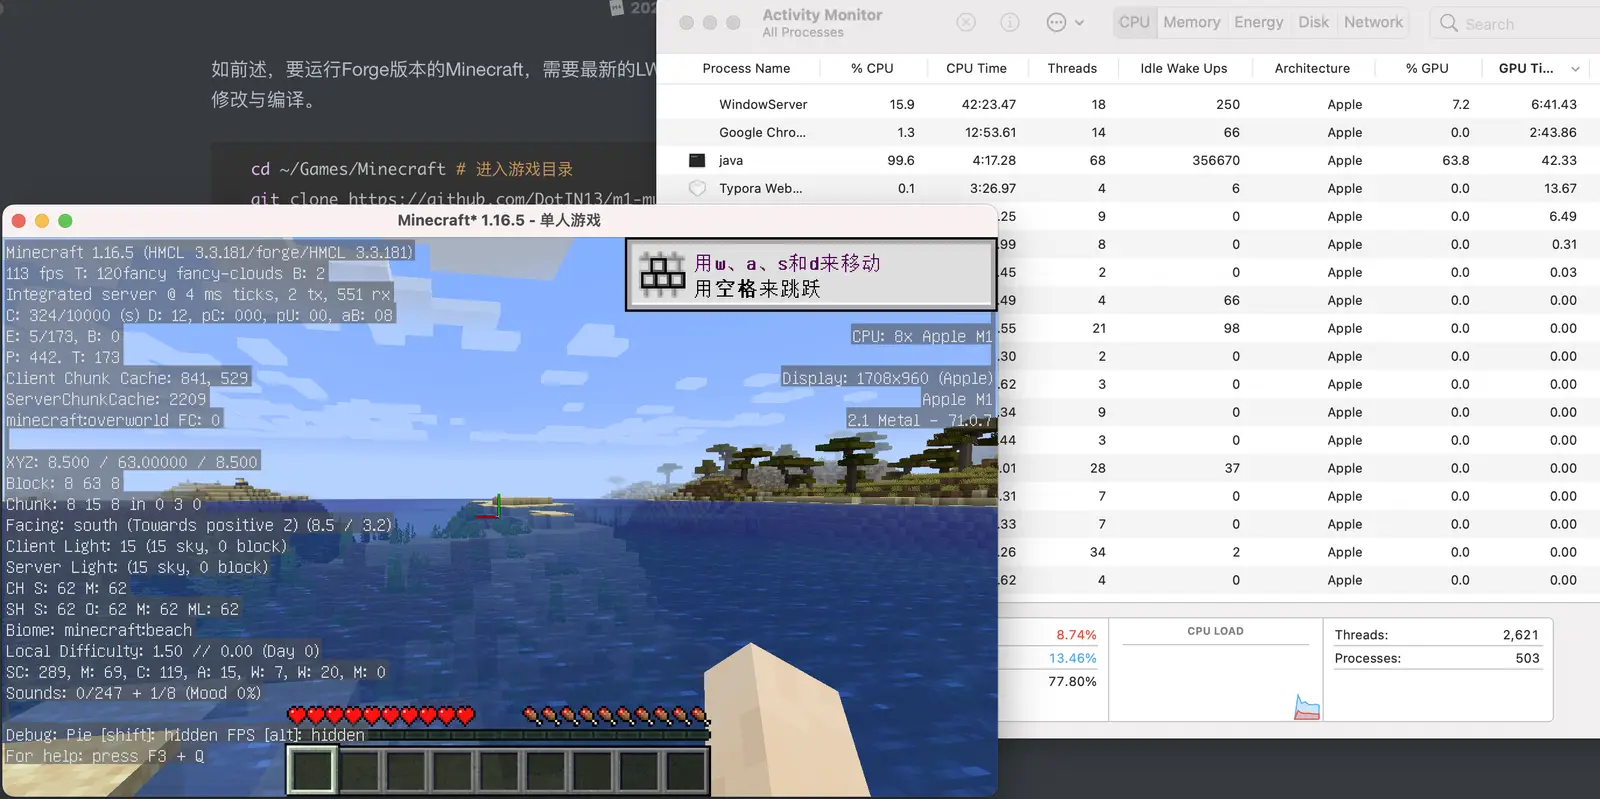
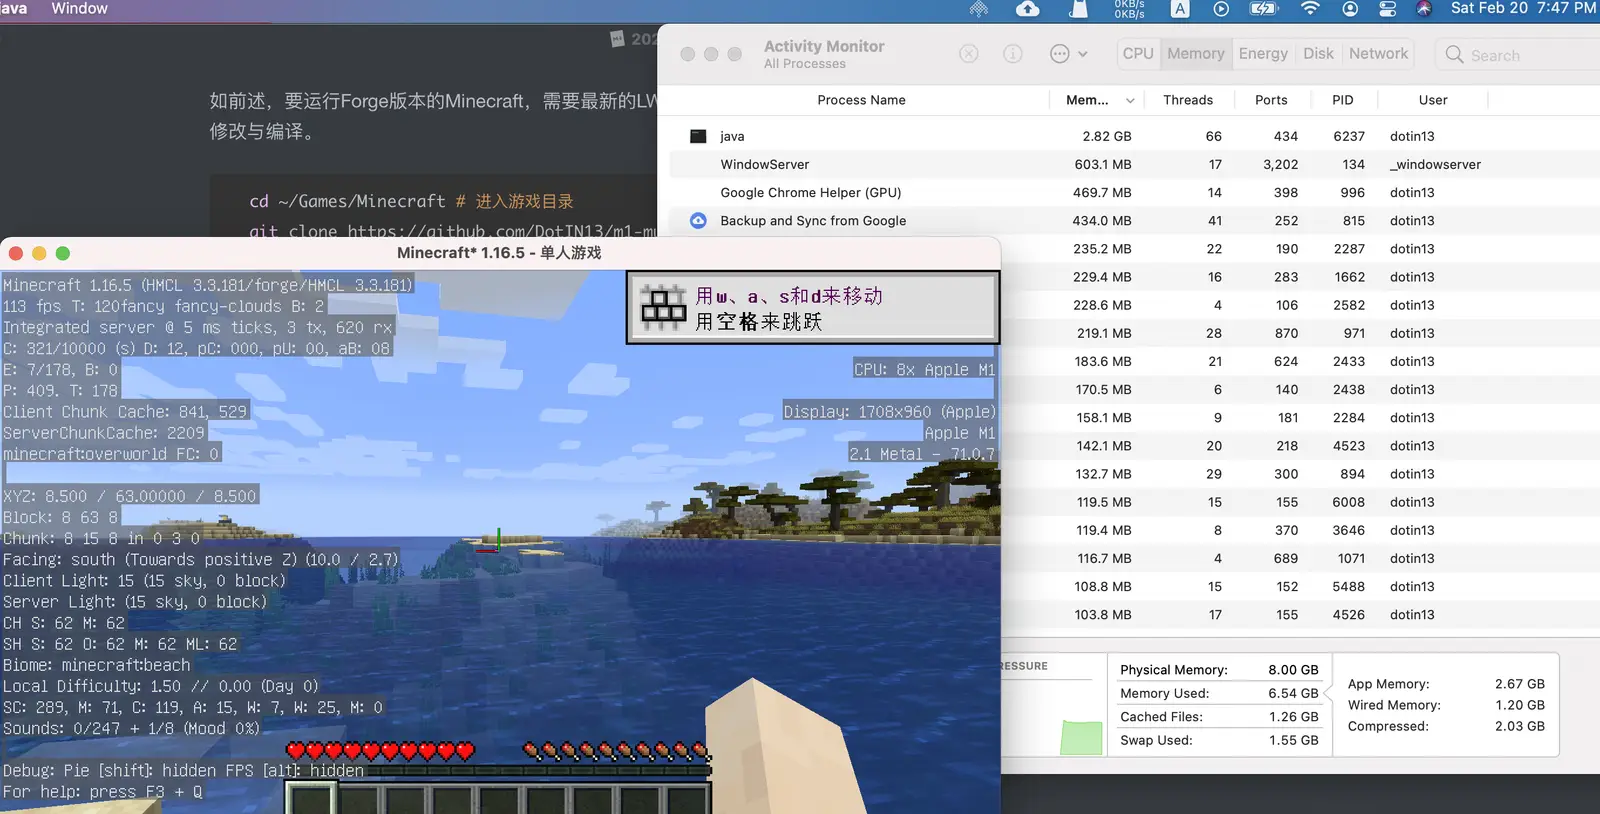
Only with Forge installed, entering the game achieved approximately 110-120 FPS, with CPU usage at 100%, and actual memory usage of 2.8GiB with 2GiB allocated.
# A Minecraft Dream
Human imagination is boundless, where there is imagination, there are always hands ready to put it into practice. Many players have realized their dream of running Minecraft without Rosetta on the M1, and the dream of running native GNU/Linux on the M1 without a virtual machine seems not far off.
Leaving our comfort zones, where do our dreams lead?