# Ruby on M1 MacBook
It seems that many adventurous friends who have purchased the M1 MacBook installed x86 Homebrew, resulting in errors when compiling Ruby. In fact, with the correct ARM64 Homebrew, you can compile and use rbenv+Ruby normally.

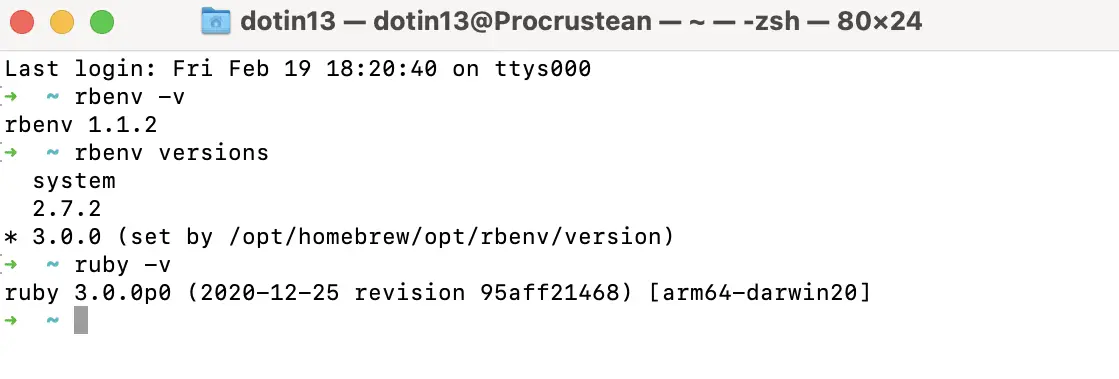
The system comes with Ruby-2.6.3. I have successfully used rbenv to install 2.7.2 for writing Jekyll and plan to use 3.0.0 to continue developing my Rails project.
# Installation Steps
# 1. Homebrew
Since Ruby compilation requires installing the ARM64 version of OpenSSL, you need to install Homebrew version 3.0.0 or later that is compatible with Apple Silicon. Simply run the script from the official website to install the correct Homebrew version. The new version of Homebrew works in the /opt/homebrew directory.
/bin/bash -c "$(curl -fsSL https://raw.githubusercontent.com/Homebrew/install/HEAD/install.sh)"
The script runs automatically, follow the prompts to install. You can use brew -v to check the brew version and ensure that brew is installed in /opt/homebrew.
$ brew -v
Homebrew 3.0.1-93-g53d840c
Homebrew/homebrew-core (git revision 70345; last commit 2021-02-17)
Homebrew/homebrew-cask (git revision 0ab858; last commit 2021-02-18)
$ which brew
/opt/homebrew/bin/brew
# 2. Install rbenv, readline, and openssl
Next, use the previously installed Homebrew to install rbenv.
brew install rbenv
When compiling ARM64 Ruby using ruby-build, you also need to install the corresponding ARM64 versions of readline and openssl.
brew install readline
brew install openssl
Then add the following environment variables to the end of ~/.zshrc.
# ~/.zshrc
# rbenv
export RBENV_ROOT=/opt/homebrew/opt/rbenv
export PATH=$RBENV_ROOT/bin:$PATH
eval "$(rbenv init -)"
# Use native openssl libraries for building
export PATH="/opt/homebrew/opt/openssl@1.1/bin:$PATH"
export LDFLAGS="-L/opt/homebrew/opt/openssl@1.1/lib"
export CPPFLAGS="-I/opt/homebrew/opt/openssl@1.1/include"
export PKG_CONFIG_PATH="/opt/homebrew/opt/openssl@1.1/lib/pkgconfig"
export RUBY_CONFIGURE_OPTS="--with-openssl-dir=/opt/homebrew/opt/openssl@1.1"
Run source ~/.zshrc or restart Terminal to apply the environment variables.
# 3. Install Ruby
To install Ruby version 2.7.2 or higher, simply run rbenv install (version).
# Example
rbenv install 2.7.2
rbenv global 2.7.2
rbenv rehash
If you need to install a lower version of Ruby, you need to add an additional FLAG.
# Example
RUBY_CFLAGS="-Wno-error=implicit-function-declaration" rbenv install 2.5.3
# Proxy
If you encounter SSL errors during the installation process, you may need a proxy to download Ruby source code. Add the following code to the end of ~/.zshrc, replacing ip:port with your proxy server IP and port.
# ~/.zshrc
export http_proxy="http://ip:port"
export HTTP_PROXY=${http_proxy}
export https_proxy=${http_proxy}
export HTTPS_PROXY=${http_proxy}
Similarly, run source ~/.zshrc or restart Terminal to apply the environment variables, and then repeat the previous step.
# Happy Coding!
Now run ruby -v, you will find that the installed Ruby can run, so let’s start bundle happily!
There’s no such thing as getting down to work; it’s more like setting up the environment and then procrastinating.
Reference: GitHub/ruby-build#1691