# Purchasing a Raspberry Pi
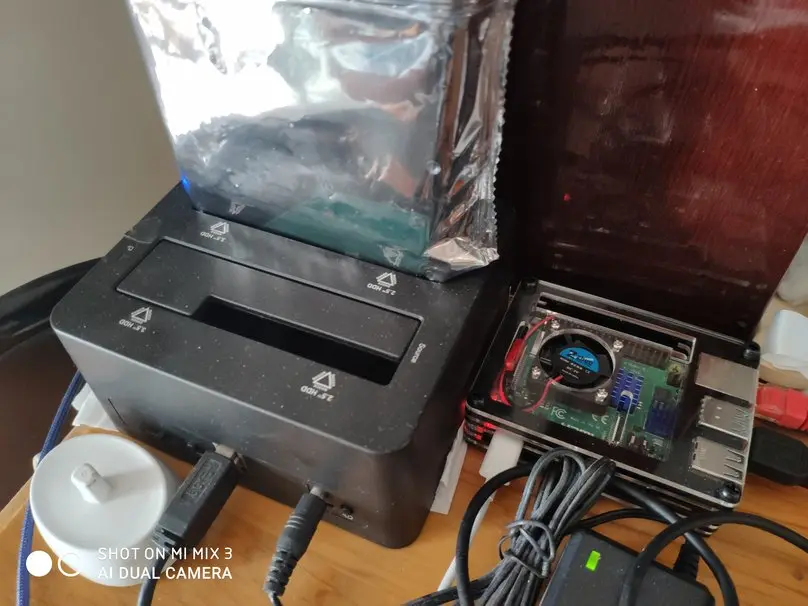
Feeling a bit too lucky, I recently splurged on a Raspberry Pi 4B. I decided to set up an Aria2 download station. Yet the public IP and port forwarding were both required for this to work.

Excitedly, I called Telecom, but the customer service representative seemed clueless and quickly transferred me to a technician. The technician discovered that I am already assigned a public IP and, sounding busy, casually asked if I knew how to port forward, then swiftly closed the case without waiting for my response.
I thought port forwarding was a piece of cake, so I didn’t give it much thought. However, when I actually tried to do it, problems arose. Port forwarding required changing the settings of the main router, but at home, the modem served as the main router, and without a super admin password, I couldn’t make any changes.
Reluctantly, I submitted another service request…
# Practice Makes Perfect
The technician sympathetically answered my second call, worrying about getting punished in salary for my repeated service calls, and agreed to help me switch to bridge mode directly in their backend.
Here, I apologize to the technician for the hassle and inconvenience caused.
In addition, a brief explanation of bridge mode:
Bridge mode is the configuration that disables the NAT feature on the modem and allows a router to function as a DHCP server without an IP Address conflict.
In simple terms, bridge mode disables the NAT feature on the modem, allowing a router to act as a DHCP server managing IP address leases. At this point, the modem can be seen as a regular Ethernet cable with optical signal conversion functionality, with all advanced router settings taking effect on the router itself.
Shortly after, the technician called back and informed me that the backend modification had failed, so I suggested that I would attempt to make the change myself. The technician agreed and provided me with the login information. However, upon logging into the modem interface at 192.168.1.1, I was taken aback. This configuration interface was much more advanced than a typical router, and I could even see data on the optical fiber signal characteristics. Feeling a bit lost, I searched for information online and finally got some clues.

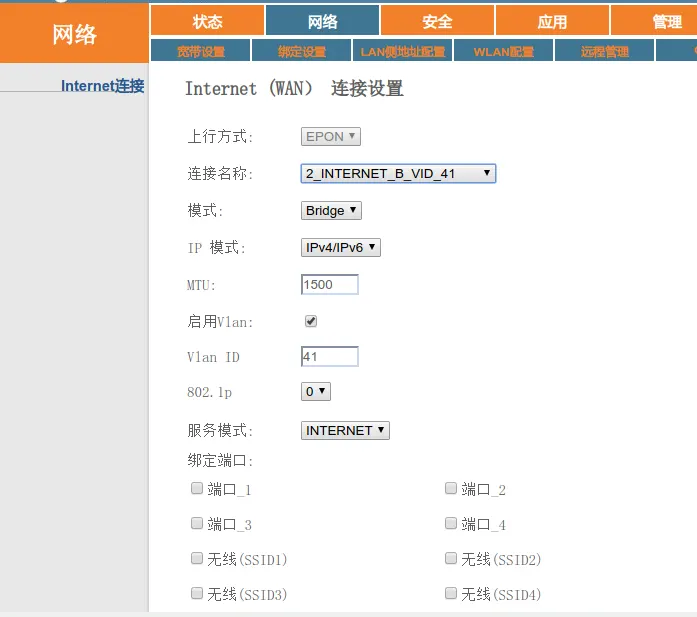
In Network -> Broadband Settings, I found the connection name and selected an option with “INTERNET” in the name from the dropdown menu. Clicking on it revealed the dial-up account and password, which I then modified to Bridge mode.
That was relatively simple, but VLAN really threw me off. Even after connecting the router, I couldn’t establish a dial-up connection. I messaged the technician, but it seemed that I had irritated them as they did not respond. After searching online for a while, I vaguely saw something about using VLAN 41 for bridge mode. I gave it a try, and to my surprise, the connection was successful.
From there, it was smooth sailing. Setting up port forwarding on the router, configuring DNS for domain resolution, and my aria2 terminal was up and running smoothly.
Hard work pays off!